

Tips for Proper Window Flashing with Tape
3 Min Read March 6, 2020
Windows are one of the most vulnerable areas to water and air leaks. Even if you’ve done it hundreds of times, flashing tricky curves and corners in order to achieve the best watertight and energy-efficient seal can be a challenge.
Huber Engineered Woods, has an advanced line of flashing solutions that include a variety of tapes and a liquid flashing material. ZIP System® Sheathing and Tape are a sheathing innovation that replaces the need for housewrap with a built-in water-resistive barrier.
Huber’s product application specialist Ben Richardson says the beauty of using ZIP System sheathing is the smooth, easy-to-flash exterior surface of the sheathing. Below are Ben’s best practices for window flashing using ZIP System™ tapes.
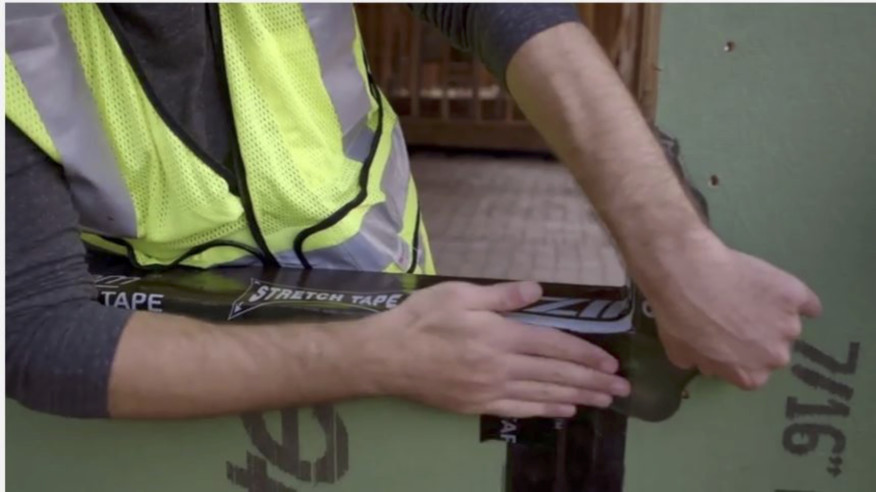
How to Flash a Window Sill Pan
Traditionally, flashing a windowsill can require some special origami skills. Applying individual tape segments to corners to ensure a continuously sealed surface can be tedious. Ben recommends 6- or 10-inch ZIP System™ stretch tape for the job. This stretch tape is a unique composite acrylic tape that stretches in all directions. All proper application requires to easily flash the entire pan, is a single piece of tape. In the first of a three-part video guide, Ben demonstrates adding 6-inches up each window jamb to create full coverage of the sill pan. Allowing a 2-inch of overhang down the front of the sill is also recommended.
WATCH: Step-by-Step Sill Pan Flashing Video
Like all ZIP System tapes, ZIP System™ stretch tape is pressure activated. For best adhesion, roll over the tape with a J-roller for a tight bond. This will smooth out any wrinkles that may have been created in application and avoids “fish mouth” areas where water could creep in. While it has an aggressive bond when completed, the unique stretchy composition of ZIP System stretch tape allows it to be pulled up and re-applied.
How to Install Flashing Over the Jambs
Install the window using a butyl or silicone sealant, per the window manufacturer’s instructions. Then flash over the nail flanges with Zip System® straight flashing tape. Make sure that the jamb flashings overlap the sill flashing at the bottom of the window, to achieve a correct shingling pattern and avoid creating a window leak path.
WATCH: Step-by-Step Video on How to Flash Window Jambs
How to Properly Install Head Flashing
Finally, flash the head of the window. ZIP System straight tape also comes in 6–inch width that will give the best adhesion surface area and makes it easy to properly cover at least 2-inches above where the window flashing ends. Make sure this header flashing also extends at least 1-inch horizontally past your jamb flashing on either side. Again, rolling the tape with a J-roller helps activate the powerful acrylic bond and smooth out any wrinkles where leaks could occur during application. Be sure to seal the interior with a low-expanding foam.
WATCH: Step-by-Step Video on How to Install Head Flashing
ZIP System sheathing and tape products provide efficiency and ease of application on the job site. Backed by a 30-year Limited Warranty and 180-day exposure guarantee. Limitations and restrictions apply. Review the warranty information here.
Building teams are adopting these next-generation products as the next evolution in building enclosures. Learn more at ZIPRevolution.com.